 This weekend (Feb 12-14th) I will be working non-stop on the thesis-specific parts of the project. Meaning, solar air collector and a concrete radiator. The week I left Buffalo (mid January), I had just finished the prototype for the concrete radiator. Now I am working on how to run hot water through it in a loop to test its efficiency. Any ideas? If you care to stop by and learn about either, I will be at the house quite often. Give me a call or shoot me an email if you're thinking of stopping by!
Wednesday, February 10, 2010
Thesis work
In it for the long haul. My thesis is due in April, so I am traveling back and forth every weekend in February to finish testing, generating data. Stressful, but necessary. Plus, I get to enjoy the perks of Matt's bread baking!
 This weekend (Feb 12-14th) I will be working non-stop on the thesis-specific parts of the project. Meaning, solar air collector and a concrete radiator. The week I left Buffalo (mid January), I had just finished the prototype for the concrete radiator. Now I am working on how to run hot water through it in a loop to test its efficiency. Any ideas? If you care to stop by and learn about either, I will be at the house quite often. Give me a call or shoot me an email if you're thinking of stopping by!
This weekend (Feb 12-14th) I will be working non-stop on the thesis-specific parts of the project. Meaning, solar air collector and a concrete radiator. The week I left Buffalo (mid January), I had just finished the prototype for the concrete radiator. Now I am working on how to run hot water through it in a loop to test its efficiency. Any ideas? If you care to stop by and learn about either, I will be at the house quite often. Give me a call or shoot me an email if you're thinking of stopping by!

Tuesday, February 9, 2010
(Re)Collection: Wasted in Buffalo
I presented on this project at school last Monday (2/1), a compilation of my work in Buffalo as well as the experimental work on turning found items (dumpsterdived in NYC) into functional furniture. My hope was that through talking about the house as well as talking about waste, I could start some inspiring conversations in and around campus...
Read below for a description of the presentation.
As you exit the elevators on the 17th floor, there is a big pile of junk. Yuck! On the wall, there is a sign with all kinds of negative words (waste, dilapidated, ugly, worthless, blight, etc). You are instructed to both take a bird hanging from the ceiling and pick out a piece of junk!

You take a bird representing the ever present seagulls around trash and unravel it to learn a fact about waste in Buffalo. Waste of resources, waste of housing (vacancy), waste of knowledge (drop out rates), etc. You read the label on the trash you just picked up and find out which NYC borough the item was found in! You need this for a later activity, so you keep it with you as you wander through the exhibit...
You continue past the entrance and arrive at a collection of photos. There are three sets of photos: waste/dilapidation in Buffalo (the before photos of the house), volunteers/progress, and into the future. You look more closely and realize that some of the photos with people in them have anecdotes attached, stories about volunteers, workshop attendees, and how they have each contributed to changing this idea of waste.
You enter a room and the presentation part begins. I briefly speak about the project and how it got started, but mostly about our perceptions of waste and how we can seek to change it. Then, the activity! I asked people to turn and introduce themselves and start talking about their piece of junk in front of them. Where did it come from? What was it originally? What could they use it for now? Could you combine it with anyone elses object at the table and make something neat?? Everyone gets into groups, not sure what to expect. A moment of silence...and then a burst of chattering. You can hear snippets from other tables...
"This looks like...a pipe. I suppose you could use it as a weapon?"
"No, it'd totally be an awesome cane!"
"Hmmm...an old piece of a coat rack?"
"Woah...definitely a future chandelier!"
"I was thinking we could combine this cool looking table leg with it and make a rustic/stylish new coat rack!"
You look down at your own object. You chose a piece of neon green Styrofoam that looks like a gigantic lego piece. Piece of styrofoam? Useless. Until wait, maybe you could use it as a stencil in the new bathroom design you are creating...someone else suggests simply reusing it for packaging/keeping another item safe in the mail...
Or, say you picked up an old wooden seat piece...hmmmm. You've always wanted a new cutting board...cut the seat down a bit, and voila! Also looks like a good sign...paint something on it and hang it in your room!
As people shared their ideas with each other they realized they are totally into this! They wanted to take items home with them and actually turn the ideas into reality. The audience reconvened for a minute as I wrap up, connecting the activity to a larger message. What you immediately labeled as waste when you first exited the elevators, now seems potentially valuable...you think about the people who are immediately written off as waste or worthless...perhaps its all in perceptions...

The presentation is over, but there's more to come! In the other room, there is an exhibit featuring many pieces of furniture that I made from trash. There are other activities to engage in too! You find the food table and...there is SO much food! Cinnamon raisin bread from Fancy and Delicious Baking Co, squash soup made from squash saved from the garden in Buffalo (actually, it's combination of farmer's market squash and squash from Kathy/Lar McNally's garden...shhhh), cheese/apples from the farmers market, fresh veggies, and a HUGE carrot cake made by a family friend! There is a canvas in the corner...there's a demonstration going on, about painting trim! It is an example of what I've been teaching at my house.
Anyway, that's pretty much the gist of the presentation. It was a wonderful and inspiring day, and there were so many great conversations that I'll probably never even know about! Until next time...
Megan
Read below for a description of the presentation.
As you exit the elevators on the 17th floor, there is a big pile of junk. Yuck! On the wall, there is a sign with all kinds of negative words (waste, dilapidated, ugly, worthless, blight, etc). You are instructed to both take a bird hanging from the ceiling and pick out a piece of junk!

You take a bird representing the ever present seagulls around trash and unravel it to learn a fact about waste in Buffalo. Waste of resources, waste of housing (vacancy), waste of knowledge (drop out rates), etc. You read the label on the trash you just picked up and find out which NYC borough the item was found in! You need this for a later activity, so you keep it with you as you wander through the exhibit...
You continue past the entrance and arrive at a collection of photos. There are three sets of photos: waste/dilapidation in Buffalo (the before photos of the house), volunteers/progress, and into the future. You look more closely and realize that some of the photos with people in them have anecdotes attached, stories about volunteers, workshop attendees, and how they have each contributed to changing this idea of waste.
You enter a room and the presentation part begins. I briefly speak about the project and how it got started, but mostly about our perceptions of waste and how we can seek to change it. Then, the activity! I asked people to turn and introduce themselves and start talking about their piece of junk in front of them. Where did it come from? What was it originally? What could they use it for now? Could you combine it with anyone elses object at the table and make something neat?? Everyone gets into groups, not sure what to expect. A moment of silence...and then a burst of chattering. You can hear snippets from other tables...
"This looks like...a pipe. I suppose you could use it as a weapon?"
"No, it'd totally be an awesome cane!"
"Hmmm...an old piece of a coat rack?"
"Woah...definitely a future chandelier!"
"I was thinking we could combine this cool looking table leg with it and make a rustic/stylish new coat rack!"
You look down at your own object. You chose a piece of neon green Styrofoam that looks like a gigantic lego piece. Piece of styrofoam? Useless. Until wait, maybe you could use it as a stencil in the new bathroom design you are creating...someone else suggests simply reusing it for packaging/keeping another item safe in the mail...
Or, say you picked up an old wooden seat piece...hmmmm. You've always wanted a new cutting board...cut the seat down a bit, and voila! Also looks like a good sign...paint something on it and hang it in your room!
As people shared their ideas with each other they realized they are totally into this! They wanted to take items home with them and actually turn the ideas into reality. The audience reconvened for a minute as I wrap up, connecting the activity to a larger message. What you immediately labeled as waste when you first exited the elevators, now seems potentially valuable...you think about the people who are immediately written off as waste or worthless...perhaps its all in perceptions...

The presentation is over, but there's more to come! In the other room, there is an exhibit featuring many pieces of furniture that I made from trash. There are other activities to engage in too! You find the food table and...there is SO much food! Cinnamon raisin bread from Fancy and Delicious Baking Co, squash soup made from squash saved from the garden in Buffalo (actually, it's combination of farmer's market squash and squash from Kathy/Lar McNally's garden...shhhh), cheese/apples from the farmers market, fresh veggies, and a HUGE carrot cake made by a family friend! There is a canvas in the corner...there's a demonstration going on, about painting trim! It is an example of what I've been teaching at my house.
Anyway, that's pretty much the gist of the presentation. It was a wonderful and inspiring day, and there were so many great conversations that I'll probably never even know about! Until next time...
Megan
Tuesday, January 19, 2010
Solar heat collector
 Apparently the 3pm time was inconvenient for many people wanting to attend the solar heat collector workshop. I got many emails telling me to switch the time, so next time I know later is better. In any event, I built most of the solar heat collector in one day...and it looks great! Had to stop because I ran out of cans, so if you have a bunch of soda or beer cans (or would be willing to host a party to get some) let me know! Materials reused include an old storm window, empty cans and some odd pieces of wood lying around. Total cost will probably be about $20. If you're interested in getting directions for making your own or would like to reschedule a workshop...email buffalobasics@gmail.com
Sunday, January 3, 2010
Frozen pipes and frozen toes
It was in the negatives today with the windchill factor. Eek. I found myself shivering even with the battery powered self-heating socks and a few extra layers of long johns I threw on in the morning. Despite the cold cold cold weather though, inside the house the mood was warm and cheery! I smiled as I came through the door, hearing the sound of the gas heater going and hammers pounding. Several volunteers were busily working away, only stopping when I brought in my aunt's "very berry" pie and Micki brought in her award winning lasagna to share! We gobbled it up as though we were at Thanksgiving dinner and then got right back to work.
Working yesterday, Jason learned his fair share about drilling holes in 100 year old wood. Today Tex learned how to break out the rest of the corroded cast iron pipe/vent. More work is going on tomorrow and all week in fact (I'm working on building green innovations for my thesis, tiling the bathroom, etc), so if you'd like to learn...be sure to stop by!
Last bit of news: my pipes froze overnight...looks like I'll have to find a better method to keep them warm. Luckily, nothing exploding, so I didn't have water pouring in my basement...knock on wood! I'm working on finishing the insulation, so hopefully then it won't be a problem. In the meantime, I'm crossing my fingers and hoping it doesn't happen again. More updates to come, but if you're interested in green design/build, come to the workshop on the 13th at 3pm to learn all about offsetting your heating bills with DIY solar air collectors!
Working yesterday, Jason learned his fair share about drilling holes in 100 year old wood. Today Tex learned how to break out the rest of the corroded cast iron pipe/vent. More work is going on tomorrow and all week in fact (I'm working on building green innovations for my thesis, tiling the bathroom, etc), so if you'd like to learn...be sure to stop by!
Last bit of news: my pipes froze overnight...looks like I'll have to find a better method to keep them warm. Luckily, nothing exploding, so I didn't have water pouring in my basement...knock on wood! I'm working on finishing the insulation, so hopefully then it won't be a problem. In the meantime, I'm crossing my fingers and hoping it doesn't happen again. More updates to come, but if you're interested in green design/build, come to the workshop on the 13th at 3pm to learn all about offsetting your heating bills with DIY solar air collectors!
Friday, December 18, 2009
Spray Foam Insulation

I was in Buffalo last weekend and worked on the spray foam insulation (sealing the gaps between the rigid foam and the joists) in the crawlspace. It's very simple...after installing the rigid foam (see previous post) and securing it, you just need to run a line of spray foam from the can all the way along the seams. You can buy it for ~$3/can.
 A word of caution: WEAR A RESPIRATOR! The chemicals from the spray foam are very bad for you to breathe. You will get sick without a mask. My uncle has a sprayfoam insulation company out in Long Island and he says that he's gotten terrible asthma-like breathing attacks...so please be careful. Spray foam is amazing stuff, but not worth sacrificing your lungs!
This month coming up...look out for DIY solar air collectors! For my thesis I am measuring the efficiency of air collectors I build out of trash. These collectors will be attached to southfacing windows to capture the sun's energy and heat up the air in the house. Keep checking on the calendar above for workshop days. Remember, it's an experiment...so the first solar air collector may not be perfect, but at least it has the potential to heat your home! If you'd like to get involved in general, please feel free to contact me...there will be lots of work going on January 2-16th. Learn a new skill and meet some awesome folks!
Happy Holidays...
Megan
Monday, December 7, 2009
Crawlspace Insulation
I was home again for Thanksgiving weekend.
No, I did not work on Thanksgiving...
Friday through Sunday was spent insulating the crawlspace underneath the first section of my house. I am unfortunate enough to not have a full basement like some of the other houses in the area, so I was inching around on my stomach using my feet to move me along! Though it is proven that the majority of your money spent on heating (something like 42%) is lost through an uninsulated attic, an uninsulated basement and crawlspace can also contribute to heat loss...especially if it is not sealed off from outside winds. So I decided to get that out of the way before the weather turned.
To insulate your basement/crawlspace you first need to measure the area. Figure out exactly how much space exists between joists (usually 16 on center...so you'll need insulation about 14 inches wide) and multiply that by the width of your house. This gives you the area of one open space...now you need to figure out how many joists span your house and multiply the area for one open section by the number of open spaces that exist in between your joists. This calculation is a bit confusing, but once you start doing it you should be able to figure it out...
ORDER EXTRA.
I decided on ordering rigid foam from Thermal Foams, a local distributor on Kenmore Ave. They were very helpful and for a small fee they delivered directly to the doorstep. Once you have your insulation ordered and set to be installed, follow the step-by-step below:
1. If you ordered pre-cut 8ft strips (ex. 14" x 8ft), then skip to step 3. If you ordered large sheets and want to cut them yourself for greater precision (the differences in my widths varied from 13" to 15+"), measure the spaces between the joists and cut the strips to fit. I used a table saw to cut the strips, much faster than any other method, but it is doable with a handsaw. MAKE SURE YOU HAVE A NUMBERING SYSTEM so you know where the strips will go.
2. Rip long 1" strips from 2x4s or from any scrap wood lying around. You will be using this to hold up your insulation against the floorboards, so you need to make enough to keep the insulation up. An alternative to this would be to tack nails into the sides of the joists...although this may be a faster method, it also seems like a more flimsy method.
3. Go into the crawlspace (bring a headlamp and goggles or you'll inevitably get dust in your eyes) and start securing the insulation in place. If you have a nail gun, GREAT! If not, insulating will not be quick and easy. Shove one strip of insulation up into a space between the joists and secure it by nailing the 1"x2" strips just under the insulation. Do this for every exposed space.
4. You're almost done...now to the foaming. Because rigid foam does not conform to the shape of the space, it can leave unsealed air gaps. In order to decrease air infiltration, you need to foam the spaces where the wood and rigid foam meet. The easiest way is to buy spray foam in cans from any major hardware store (Dibbles, Home Depot, etc). You will need a lot of foam, but it'll be worth it in the end!
I have yet to completely seal the space by adding the spray foam, so if you're interested in seeing it in action, contact me! Unfortunately the foam is only useable in 40 degrees or higher...so I may have to wait until a warm winter day, or even springtime to finish this project. Meanwhile, I'm losing heat! Ah! I will be home this weekend and working on various projects around the house (namely insulation...finishing the insulation in the basement and in the attic). Definitely call me if you would like a demonstration...of insulation, of drywalling, anything!
Hope you're all staying warm this season.
Megan
No, I did not work on Thanksgiving...
Friday through Sunday was spent insulating the crawlspace underneath the first section of my house. I am unfortunate enough to not have a full basement like some of the other houses in the area, so I was inching around on my stomach using my feet to move me along! Though it is proven that the majority of your money spent on heating (something like 42%) is lost through an uninsulated attic, an uninsulated basement and crawlspace can also contribute to heat loss...especially if it is not sealed off from outside winds. So I decided to get that out of the way before the weather turned.
To insulate your basement/crawlspace you first need to measure the area. Figure out exactly how much space exists between joists (usually 16 on center...so you'll need insulation about 14 inches wide) and multiply that by the width of your house. This gives you the area of one open space...now you need to figure out how many joists span your house and multiply the area for one open section by the number of open spaces that exist in between your joists. This calculation is a bit confusing, but once you start doing it you should be able to figure it out...
ORDER EXTRA.
I decided on ordering rigid foam from Thermal Foams, a local distributor on Kenmore Ave. They were very helpful and for a small fee they delivered directly to the doorstep. Once you have your insulation ordered and set to be installed, follow the step-by-step below:
1. If you ordered pre-cut 8ft strips (ex. 14" x 8ft), then skip to step 3. If you ordered large sheets and want to cut them yourself for greater precision (the differences in my widths varied from 13" to 15+"), measure the spaces between the joists and cut the strips to fit. I used a table saw to cut the strips, much faster than any other method, but it is doable with a handsaw. MAKE SURE YOU HAVE A NUMBERING SYSTEM so you know where the strips will go.
2. Rip long 1" strips from 2x4s or from any scrap wood lying around. You will be using this to hold up your insulation against the floorboards, so you need to make enough to keep the insulation up. An alternative to this would be to tack nails into the sides of the joists...although this may be a faster method, it also seems like a more flimsy method.
3. Go into the crawlspace (bring a headlamp and goggles or you'll inevitably get dust in your eyes) and start securing the insulation in place. If you have a nail gun, GREAT! If not, insulating will not be quick and easy. Shove one strip of insulation up into a space between the joists and secure it by nailing the 1"x2" strips just under the insulation. Do this for every exposed space.
4. You're almost done...now to the foaming. Because rigid foam does not conform to the shape of the space, it can leave unsealed air gaps. In order to decrease air infiltration, you need to foam the spaces where the wood and rigid foam meet. The easiest way is to buy spray foam in cans from any major hardware store (Dibbles, Home Depot, etc). You will need a lot of foam, but it'll be worth it in the end!
I have yet to completely seal the space by adding the spray foam, so if you're interested in seeing it in action, contact me! Unfortunately the foam is only useable in 40 degrees or higher...so I may have to wait until a warm winter day, or even springtime to finish this project. Meanwhile, I'm losing heat! Ah! I will be home this weekend and working on various projects around the house (namely insulation...finishing the insulation in the basement and in the attic). Definitely call me if you would like a demonstration...of insulation, of drywalling, anything!
Hope you're all staying warm this season.
Megan
Friday, November 6, 2009
Election weekend, windows and weatherization
Columbia/Barnard gives us the weekend off so we can go home and vote. I took advantage and went home to work on the house all weekend! I was working alone, then suddenly VOILA! I find myself working with 1 then 3 then 6 other people! Matt's mother taking a day to learn about bread baking with her son, Jason learning the precision of cutting drywall, Micki and Bryan helping out in the upstairs bathroom, Vince and my mother tearing out lathe, Dave offering expertise on insulation, Ken showing how to fix minor roof leaks, my father fiddling with the leaky toilet, people stopping by to pick up bread...A community atmosphere and a constant desire to learn has become a part of the house. It's wonderfully refreshing to be in such an atmosphere in comparison to living in the Big Apple.
Work continues on the house, slowly but surely. It's hard when I'm not there to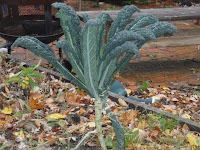 coordinate. The first floor is looking really great--almost all of the drywall is complete! It's almost looking like a real home. The weather is getting much much colder, so we closed off all the entrances to the upstairs to increase the efficiency of the gas heater that heats the downstairs. Also because it is cold, we put the garden to bed for the winter...covering all the beds with dead leaves that will add nutrients to the garden beds for next spring. It looks odd considering a month ago we still had tomatoes and salad and beans and beets! All that's left is the lone kale...
To note: If you have a house with somewhat leaky windows, a temporary fix is using the plastic covers that seal tight your windows, not allowing air infiltration. Super helpful because you can lose a lot of heat this way! It's a quick an easy fix. Although, I should say...do not rely on this. Plastic is not a good material--it is harmful for the environment! Fix your windows and you won't need to do this temporary solution. Call/email me if you would like more information on fixing and weatherizing windows. Also, I'm home in a few weeks for thanksgiving...working on insulating the crawlspace and basement with rigid foam. So if you're interested in learning about insulation, would like a workshop or a five minute demo, contact me as well!
Last update: Research continues on DIY green technologies. I'm looking at a solar heat collector, building it out of aluminum cans painted black and channeling the hot air in through a window. Sort of like a forced air system, only it only works during the day and uses no fossil fuels. Also thinking of trying to capture some of the heat from the oven and channeling it into the house? If anyone ever has thoughts or suggestions...anything would be appreciated. The beauty of this house is that I'm willing to try anything and everything! So bring the craziest ideas to the table and I'll try it...given it's not outrageously expensive.
Work continues on the house, slowly but surely. It's hard when I'm not there to
 coordinate. The first floor is looking really great--almost all of the drywall is complete! It's almost looking like a real home. The weather is getting much much colder, so we closed off all the entrances to the upstairs to increase the efficiency of the gas heater that heats the downstairs. Also because it is cold, we put the garden to bed for the winter...covering all the beds with dead leaves that will add nutrients to the garden beds for next spring. It looks odd considering a month ago we still had tomatoes and salad and beans and beets! All that's left is the lone kale...
To note: If you have a house with somewhat leaky windows, a temporary fix is using the plastic covers that seal tight your windows, not allowing air infiltration. Super helpful because you can lose a lot of heat this way! It's a quick an easy fix. Although, I should say...do not rely on this. Plastic is not a good material--it is harmful for the environment! Fix your windows and you won't need to do this temporary solution. Call/email me if you would like more information on fixing and weatherizing windows. Also, I'm home in a few weeks for thanksgiving...working on insulating the crawlspace and basement with rigid foam. So if you're interested in learning about insulation, would like a workshop or a five minute demo, contact me as well!
Last update: Research continues on DIY green technologies. I'm looking at a solar heat collector, building it out of aluminum cans painted black and channeling the hot air in through a window. Sort of like a forced air system, only it only works during the day and uses no fossil fuels. Also thinking of trying to capture some of the heat from the oven and channeling it into the house? If anyone ever has thoughts or suggestions...anything would be appreciated. The beauty of this house is that I'm willing to try anything and everything! So bring the craziest ideas to the table and I'll try it...given it's not outrageously expensive.
Subscribe to:
Posts (Atom)